Cloud Softphone Installation Guide
Cloud Softphone can be downloaded at the following links:
Make sure before you start that you have a PBX Extension available on your account (https://www.voipportal.com.au). To create an extension in your voipportal account, click on PBX Extensions, and then ‘Add Extension‘
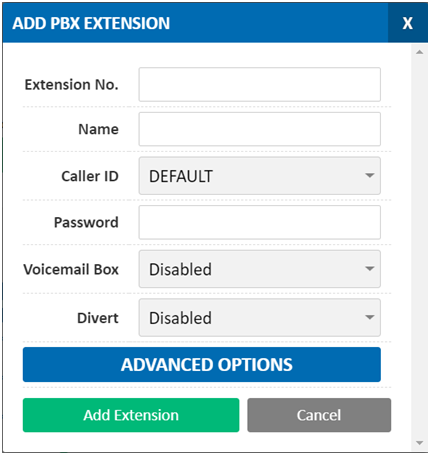
Enter the extension number and name you want for the new extension.
NOTE: Each deskphone or softphone needs a separate extension number. They can not be shared. PLease let Tronic staff know if you need more available extensions on your account.
Now click ‘Edit‘ on the Extension you have just created. Now you’ll be able to enable ‘Cloud Softphone’, and a QR Code will appear.
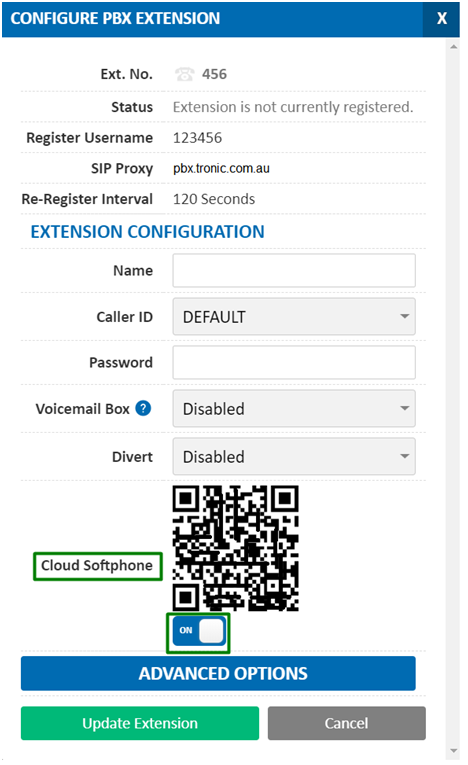
Note: this QR code option will only appear if there is no other device registering to the Extension
We highly recommend you set the codec of any cloud softphone extensions to “ilbc”
This provides the perfect combination of voice quality and bandwidth utilisation for WIFI and 4G connections.
More information on ILBC CLICK HERE
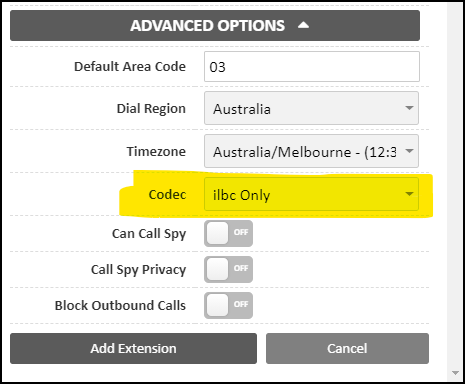
Under the Cloud softphone extension click on Advanced. This will open more options like above. Change codec to “ilbc Only“. Then Add extension or Update Extension if editing existing extension.
To install the application you can use the links at the top of this guide or if you search for “Cloud Softphone” in the app store it’s the first application with this icon its created by Acrobits.
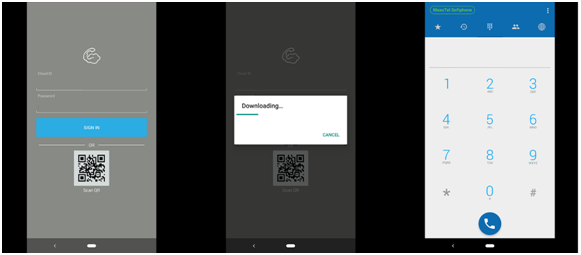
Once the app is installed on your device open the application and on the first screen click on the QR code highlighted in yellow below.
If you may get asked for approval to access camera click yes
Then using the camera on the phone take a picture of the QR code for the correct user from the voipportal website.
Your phone will then come up with a “Downloading” screen give it a bit of time and you then may be asked to approve access to the microphone and speaker to make calls and the contacts on your phone for your own use. Click yes to all.
Once you get the dial pad and the Top left label “VoIP Portal” is green then you are live and ready to call.