Cloud Softphone Usage Guide
Making Calls
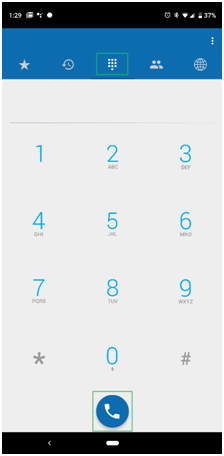
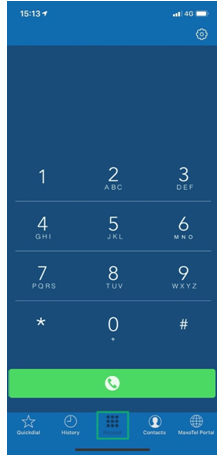
To place a call, select the  icon from the menu bar, enter the phone number you wish to dial, then press the
  icon.
icon.
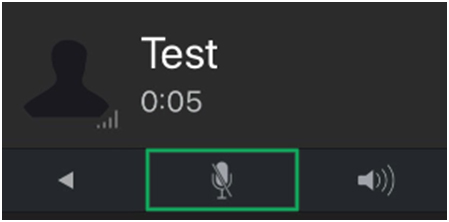
When the call is established, you will see the
following options:
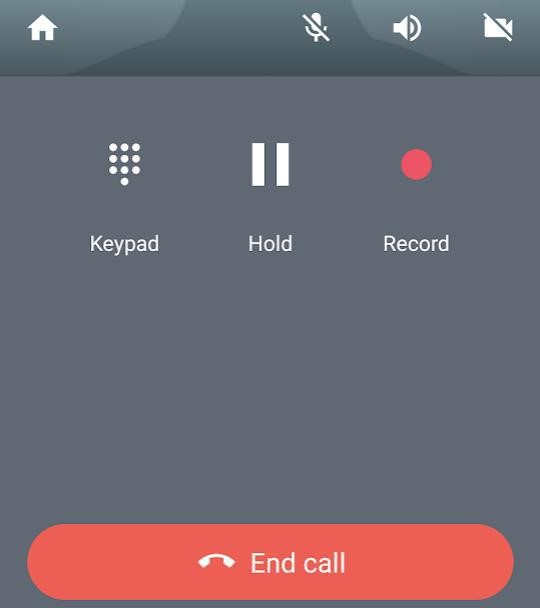
To mute/unmute your microphone, press: 
To toggle between Speaker or Headset mode: ![]()
To access your keypad click:
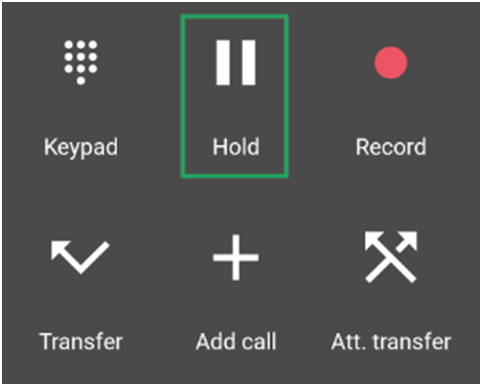
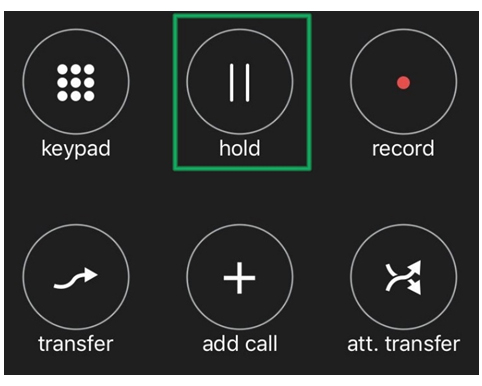
To place the call on hold, press: 
To resume the call press the same button:
You can record your calls by clicking: 
To terminate the call, press: 
Mute and Hold
You can mute your microphone while in a call, by pressing the Mute button. To unmute, press the button again

To place a call on hold, press the Hold button. To resume the call, press this again.
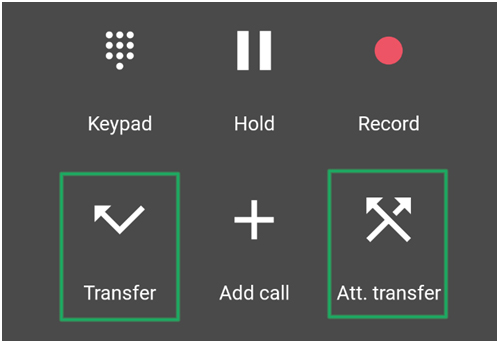
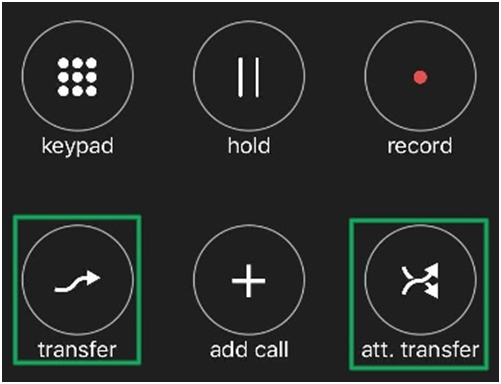
Transferring Calls
While you’re in an active call, you can transfer the other party to another PBX extension or external number.
To do so, press either the Transfer or Att Transfer button.
- Transfer: Conducts a blind transfer, that will send the call directly to the destination party
- Att Transfer: Conducts a warm transfer, connecting you to the destination party to introduce the call before putting the caller through
Initiating a transfer will automatically put the original caller on hold and display the dial pad. Enter the number of the destination party, then press the Transfer button or the Dial icon, depending on your transfer type.
If you’re performing an attended transfer, you will connect to the target party and can either press Transfer to pass the call to them, or Cancel to return to the original caller.

ACCEPTING OR DECLINING A CALL
You can Answer, Ignore or Reject incoming calls just by clicking on the desired option when the call comes through. Ignoring a call will just mute the ringtone until the call is naturally sent to voicemail after certain time.
Rejecting a call will forward it to your voicemail.

Conferencing A Call
To initiate a conference, while you’re on a call, press Add Call. Enter the phone number of the person you wish to conference in, then press Dial

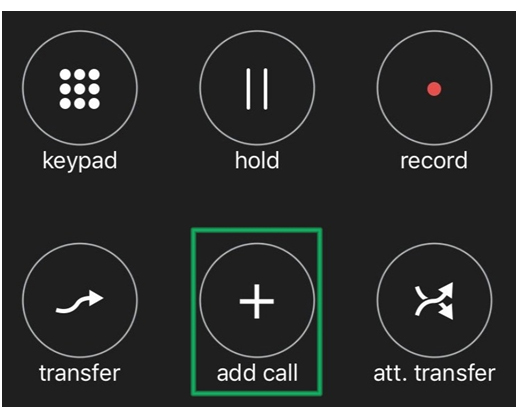
Once connected, press the Join button to add the third party into your call

Monitoring Other Extensions
You can use Cloud Softphone to see whether other extensions on your PBX are available, on a call, or currently ringing. To do so, select the star icon from the menu bar
![]()
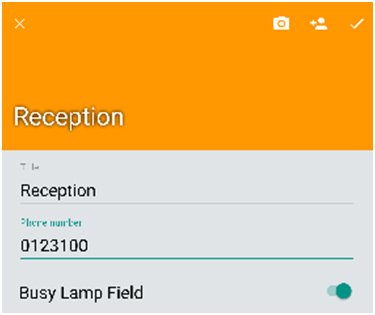
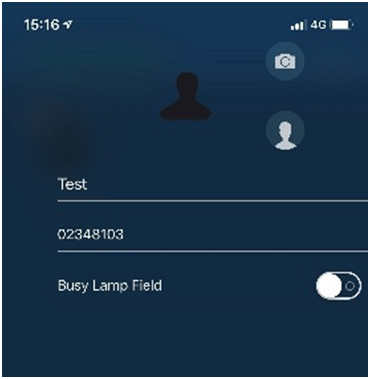
Click the Menu option, then choose Edit to enter edit mode and click the + button to add a new extension
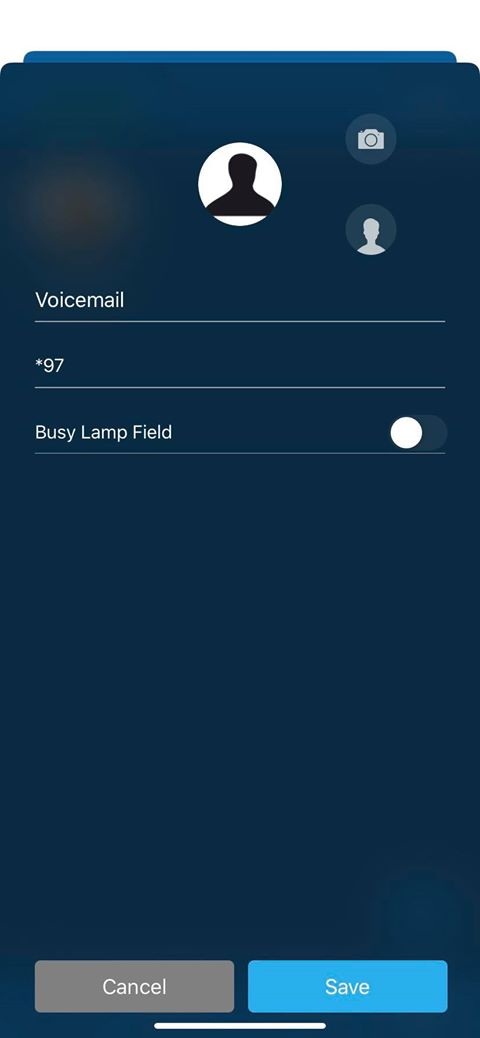
Enter a name for the extension, then provide the full extension number, including the prefix. This can be retrieved from the My Account Portal, by selecting PBX Extensions, then clicking Edit on an extension. If the target phone is already registered, you can find this in the Status field, as below:

If the target phone is not currently registered, you can retrieve this from the Register Username field.
Enable the Busy Lamp Field option, then click the tick to save (Android), or press the save button (iPhone).
Any extensions you’re monitoring will now show their on-call status, from either Off Call, On Call, or Ringing.

To remove an extension from being monitored, re-enter Edit mode, then click the ion from being monitored, re-enter X corresponding to their extension.
TO CHECK FOR MISSED CALLS
Look for this icon: and click  on it. In this case, it will indicate you have 1 missed call.
To Check VoiceMail from Cloud App:
To access your voicemail messages and/or record your voicemail greeting you either need to dial *97 from the app or edit the settings to display the voicemail button on the dialing screen.
If you have setup a password which is not set by default, you will be asked to enter your extension voicemail password followed by the # button (1234# by default).
See setting up voicemail user guide for more information on voicemail setup
To add voicemail button to Favourites/Quick Dial screen
Android and IOS/Apple
To add voicemail button to favourites/quick dial screen as per below picture. This will quickly access voicemail with one button press

To add. Start by selecting the star icon from the menu bar at top or bottom of screen depending on what phone you have.
![]()
Click the Menu option, then choose Edit to enter edit mode and click the + button to add a new button
As per the second screen below.
Enter a name for button ie Voicemail, then enter *97 to access the voicemail assigned to your cloud extension. or 50003 for another mailbox.
Android Only
To add voicemail button to dialing screen as per below picture.
Go to Settings/Preferences/Controls/ and select Always Show voicemail Button.
You will now have a dedicated voicemail button. This will access the voicemail box assigned to your cloud app extension number.

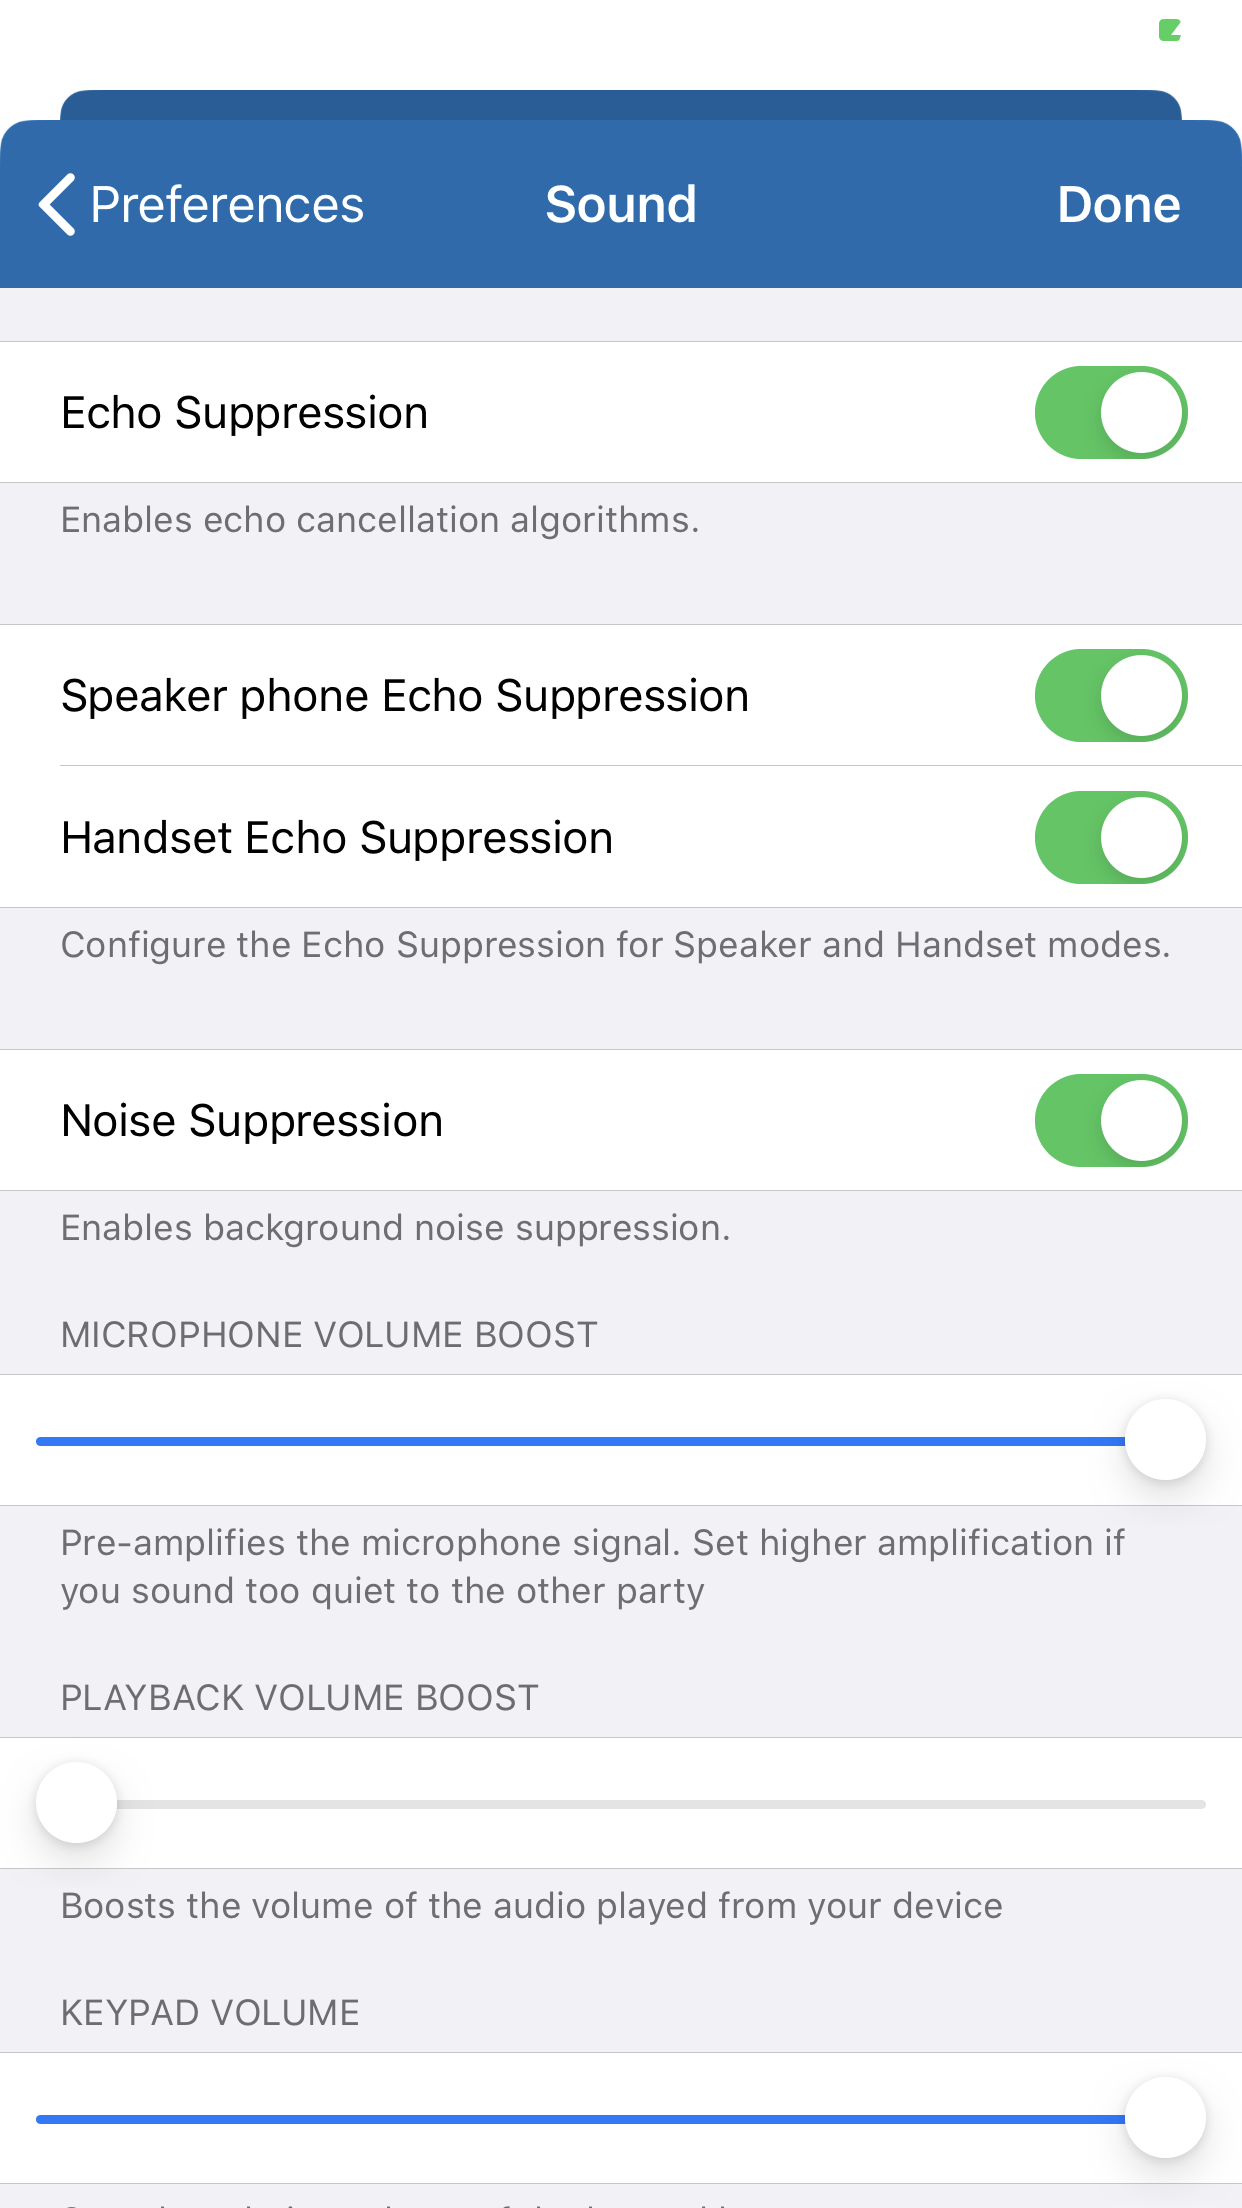
Echo Cancellation and Silence Suppression:
Some user have reported excessive or annoying echo of their own voice or background noise stopping the external caller hearing them while on a call using the cloud softphone app.
If you Experience any of these it’s an easy fix as the app has features that you can turn on to combat these issues.
Android
Click on the 3 Vertical DOTS, then Settings on the top right of the app.
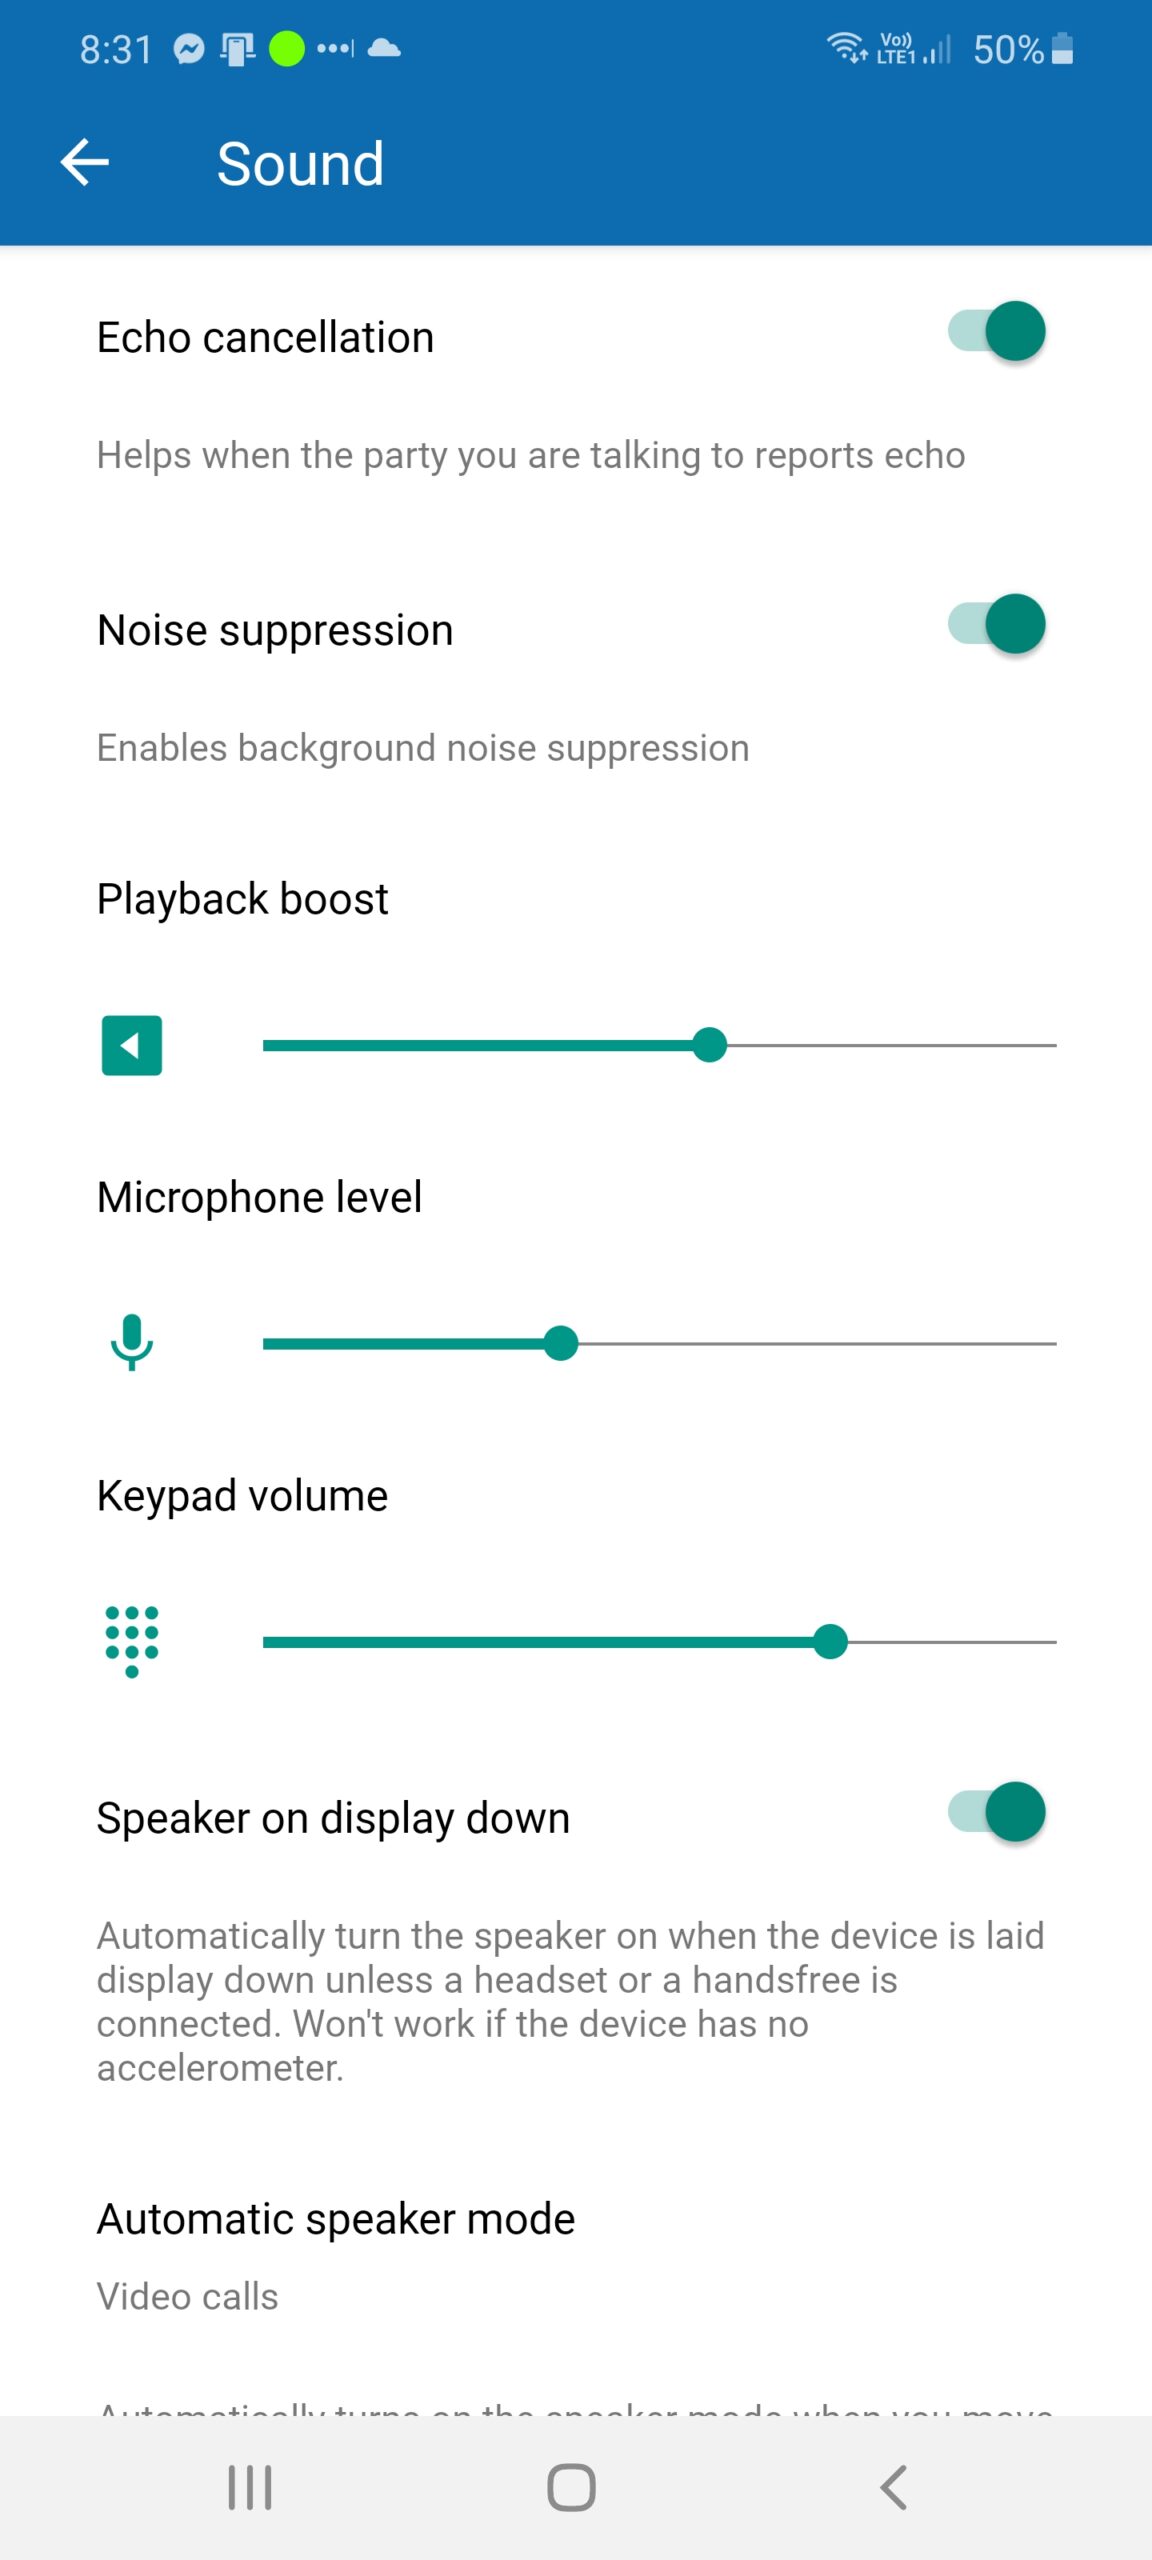
Then click on Preferences then click Sound.
Tick the Echo Cancellation and/or Sound Suppression option depending on your issue. See picture below
IOS/Apple
Click on the COG then settings on the top right of the app.
Then click on Preferences then click Sound.
Tick the Echo Cancellation and/or Sound Suppression option depending on your issue. See picture below