

Manually Configure Yealink T4 Series

(T41/T42/T46/T48)
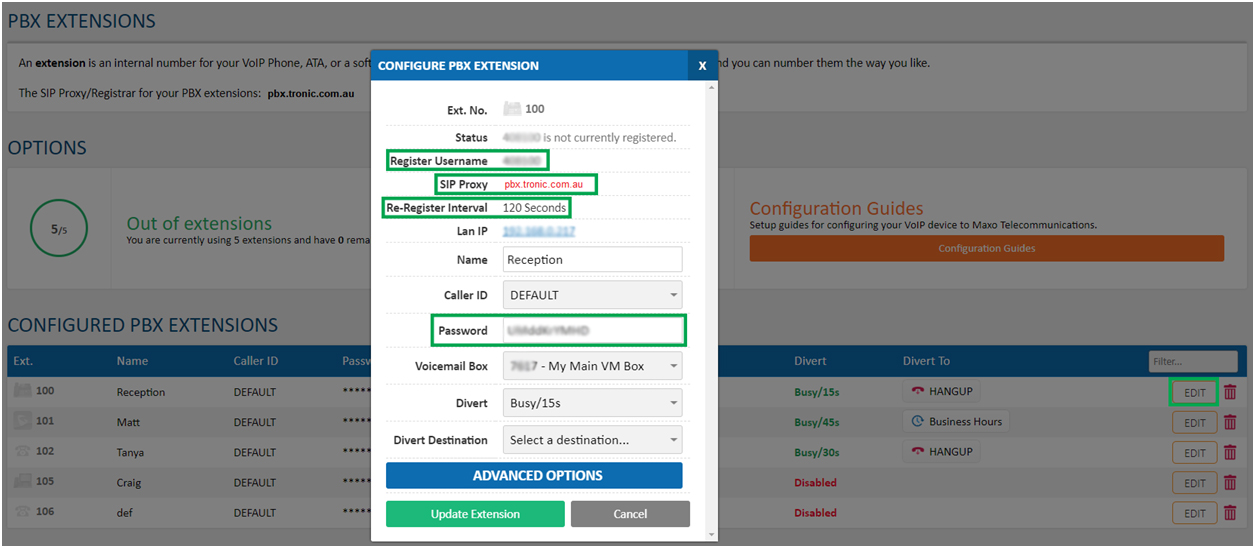
Make sure before you start that you have an extension available on your account (https://voipportal.com.au/). To create an extension in your Tronic Cloud account, click on PBX Extensions, and then “Add Extension” (If you are using a SIP Trunking or Residential Account, click on SIP Trunks, and then “Add Extension”). When configuring the Yealink phone, you’ll want to use the “Register Username” (not the shortened Extension Number) and the Password of the Extension you’ve created:
To configure the Yealink T4 Series to your Tronic Cloud account, first retrieve the IP Address so that you can log into the ‘Web Configuration’ via your computer. To do this, the press the ‘OK’ button in the middle of the D-Pad. The IP Address should show up in the Status Page. Enter The IP Address into your web browser.
Once you are on the Web Configuration page enter the username and password. By default the username will be ‘admin’ and the Password will be ‘admin’.
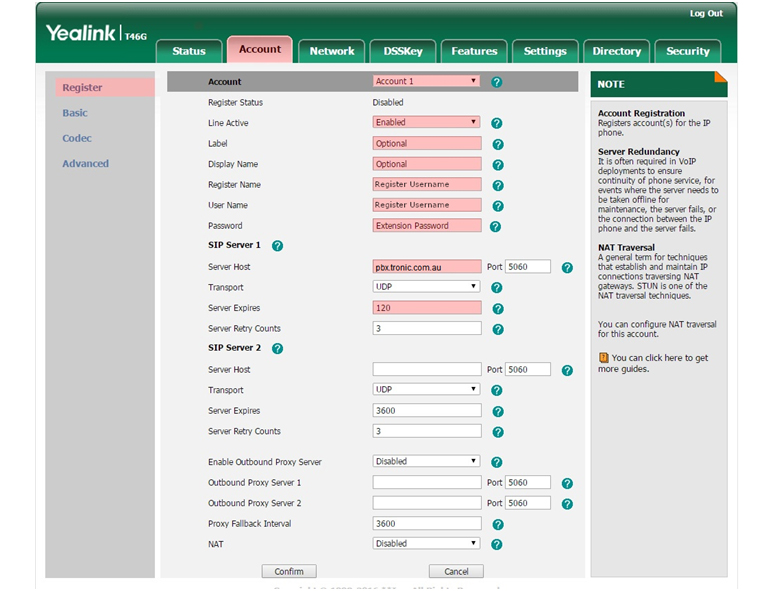
Once you have successfully logged in, click on the ‘Account’ tab across the top. Here you will place your Extension number and password from the extension you previously made and the SIP Server (pbx.tronic.com.au for Hosted PBX accounts, or sip.tronic.com.au and Sip Trunking accounts) as the below screenshot shows:
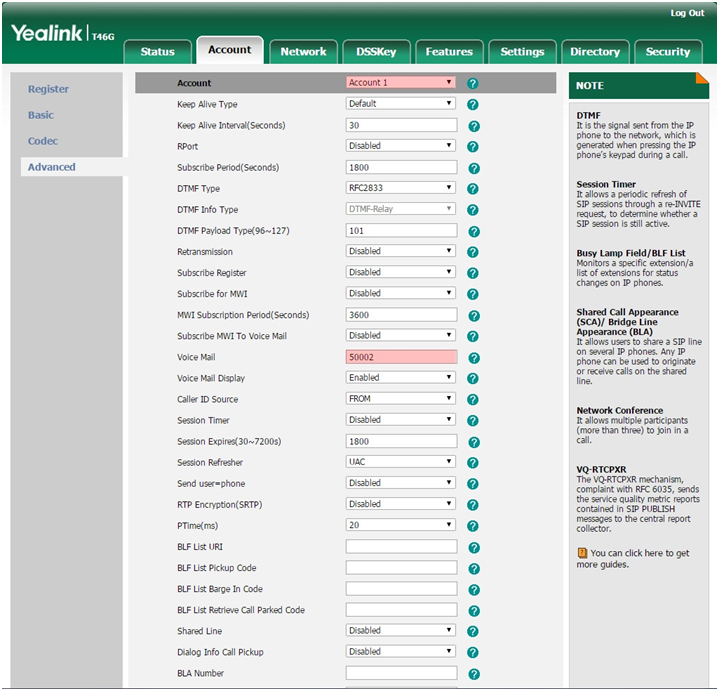
Hit the ‘Confirm’ Button at the bottom of the page to save the details. Once the page has reloaded, click on advanced and type ‘50002’ into the ‘Voicemail’ field, and change the “Caller ID Source” from “FROM” to “RPID-FROM”. Again, hit ‘Confirm’ to save the settings.
Next, click on the ‘DSSKey’ tab at the top. In here you will configure multiple DSS keys to all use Account 1 on the handset, allowing you to make, receive and manage multiple calls through your extension number, by showing each call on its own DSS Line key.
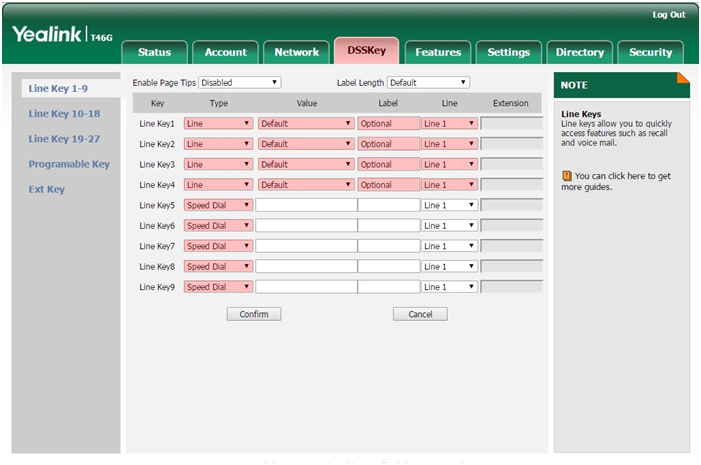
Feel free to also setup some Speed Dials for important numbers. If you would like to setup BLF (Busy Lamp Field) to see the status of the other extensions please refer to the BLF Guide: Yealink BLF Configuration
Now that the lines have been configured, you will now want to set the time zone and time format, which can be done under the top ‘Settings’ tab, and then the ‘Time and Date’ button on the left.
At this point, the phone should be ready to go. If you have any troubles making and receiving calls from here on in, please give Tronic a call on 1300 799 095