

Yealink Address Book Setup
Your Yealink handset can be configured to subscribe to any of the Address Books configured in VoIP Portal at https://voipportal.com.au
To begin, you’ll need the unique URL for you address book, which can be retrieved by logging in to VoIP Portal at https://voipportal.com.au and selecting Hosted PBX > Address Book, then clicking Edit in the title bar of your desired address book.
For more information on adding or managing address books, please refer to Portal Guide – Address Book – Below
Once you have your URL, retrieve the IP address of your Yealink phone (tap OK, then look for the ‘IPv4 Address’ field), enter this into your web browser, and login when prompted. The default username is admin and the default password is admin
If you have the green web interface, select Directory, then Remote Phone Book. In the Remote URL field provided, paste the unique URL from the Address Book, and provide a display name, for example:
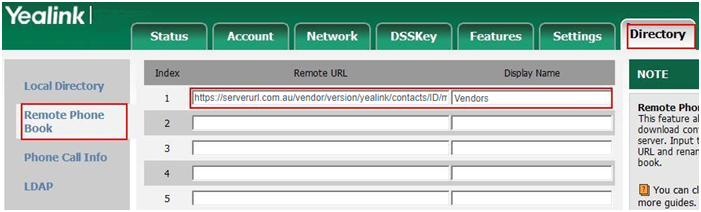
If you’re on the black web interface, navigate to Directory, then select Remote Phone Book..

In the Remote URL field provided, paste the unique URL from the Address Book, and provide a display name, for example:.

If you have multiple address books you’d like to synchronise, enter the unique URL for each address book, and a descriptive name for each entry.
If desired, you can enable Incoming/Outgoing call lookup, which will attempt to match any numbers with their name in the contact list. If enabled on the phone, this will override any caller ID text or prefixes set by the phone system.
Once done, click Confirm. You can now use theDirectory key on your handset to quickly dial any of your contacts.
Portal Guide – Address Book
An address book is a list of contacts, which can be synchronised with Yealink handsets and cloud softphone to allow for dialling from the contacts on the handset.
In addition, if a party calls in that has a phone book entry, the incoming call can optionally be marked with their name.
To create or manage an address book, login to https://www.voipportal.com.au and select Hosted PBX and Address Book.
Adding or Managing an Address Book
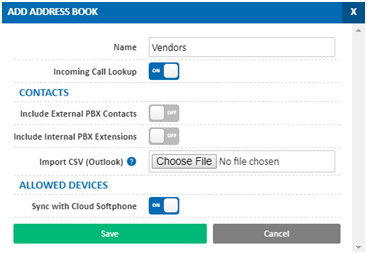
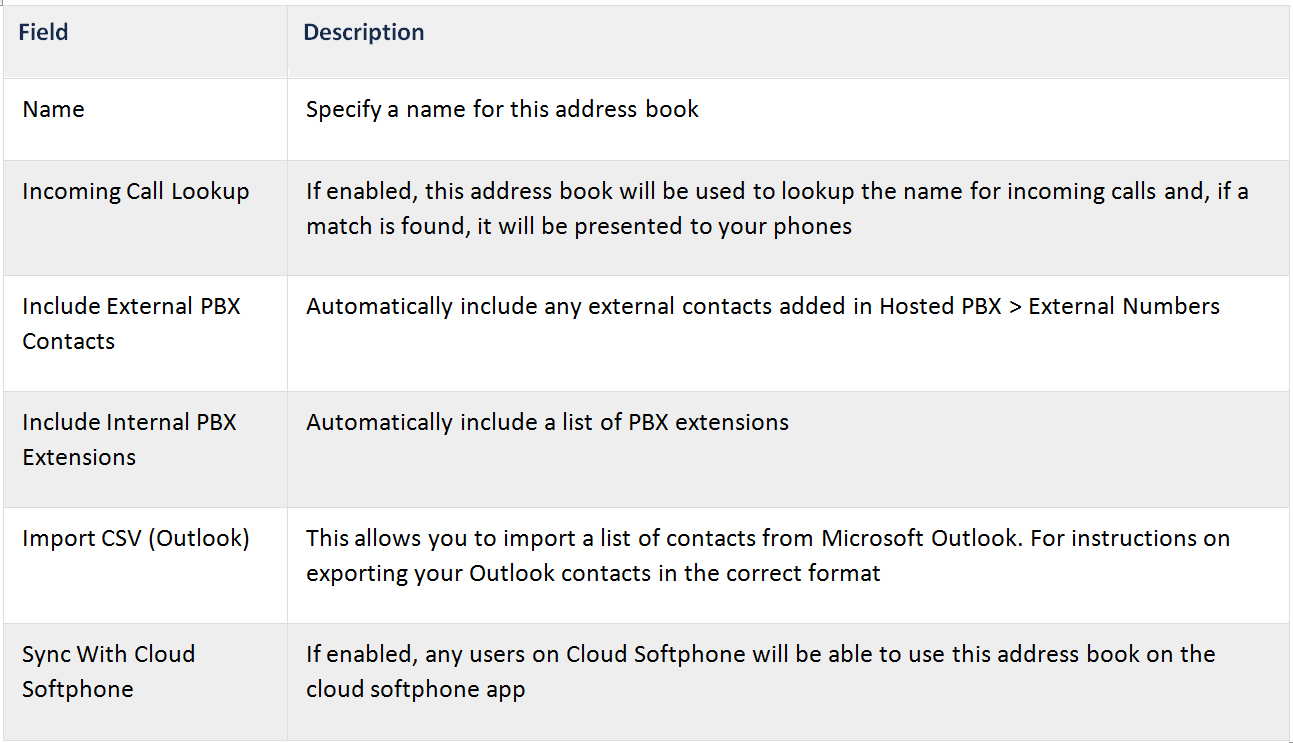
Add a new address book by selecting the Add Address Book button, or manage an existing address book by clicking the Edit button in that address book’s title bar. You will be presented with the address book options, which are detailed below:
Adding and Removing Contacts
To add a new contact to an address book, click the +Add Contact button

You’ll be presented with the contact dialogue, to specify name, number, and number type (eg. Work, Home, etc.)

To remove a contact, locate them in the address book contact list, then select the ![]() to remove them. You can also update a contact’s name or number by using the Edit button.
to remove them. You can also update a contact’s name or number by using the Edit button.
Using the Address Book With Your Handset
Each address book is assigned a unique URL which can be entered into your Yealink phone’s configuration. This will synchronise the contact list on the phone with the address book on the server, adding the entries to the phone’s directory.