

Yealink Automatic Provisioning
Provisioning of Yealink phones for Hosted PBX services can now be done through https://voipportal.com.au
To begin configuring your handset/s, login to https://voipportal.com.au and select PBX Extensions
Configuring Yealink Phones
To set an existing handset to an extension, find the MAC address of the handset you’re configuring, then click Edit. To locate a handset’s MAC address, for example if you’re setting up several and would like to be sure you’re working on the correct phone, please see Locating a Handset MAC Address at the end of this guide
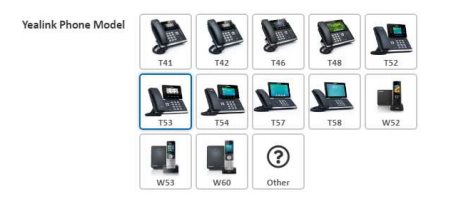
Set the Phone Name, for example ‘Bob’ and, if it’s not already selected, choose the phone’s model.
If you’d like the handset to subscribe to any of your Address Books, select the appropriate entry in the Address Book field. To learn more about setting up address books, please see Portal Guide – Address Book
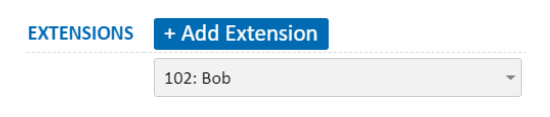
Finally, select the Extension that this phone should connect to from the Extensions field. If this phone should connect to more than one extension, use the +Add Extension button to attach additional extensions. For more information on creating new extensions, please refer to Portal Guide – PBX Extensions and Sip Trunks
Adding a New Handset
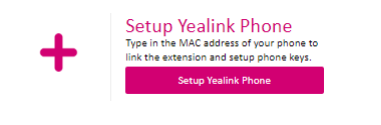
If the handset you’re working on hasn’t previously been added to the provisioning system, click the Setup Yealink Phone button
In the Add Phone box, enter the phone’s name, for example ‘Bob’

Enter the phone’s MAC address. You can locate this MAC address from the phone’s web interface, the handset box, or the rear of the device. Please see Locating a Handset MAC Address at the end of this guide.

Select the phone’s model from those available or, if your model isn’t listed, select Other.
If you’d like the phone to subscribe to any of your hosted Address Books, select the appropriate entry in the Address Book field. To learn more about setting up address books, please see Portal Guide – Address Book

Finally, select the extension/s that this phone should connect to, You can have the phone connect to multiple extensions which can be useful if you’re running multiple business units from the same handset – simply use the +Add Extension button.
Click Save to add the phone.
Please note: Phones purchased from third party suppliers may be added to the Tronic provisioning system, however we’re unable to guarantee initial success or ongoing support. The phones may have already been added to another retailers provisioning service, or may be moved to the original retailer’s provisioning service by Yealink, without notice.
Configuring Keys
To configure the DSS Keys on your phone, locate the extension or phone you’d like to setup, then click Keys

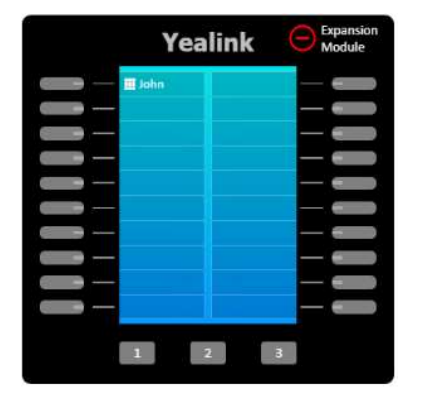
You will be presented with a picture of your handset, along with the keys available for
configuration. To add a function to a key, click the key or the corresponding section on the
display.
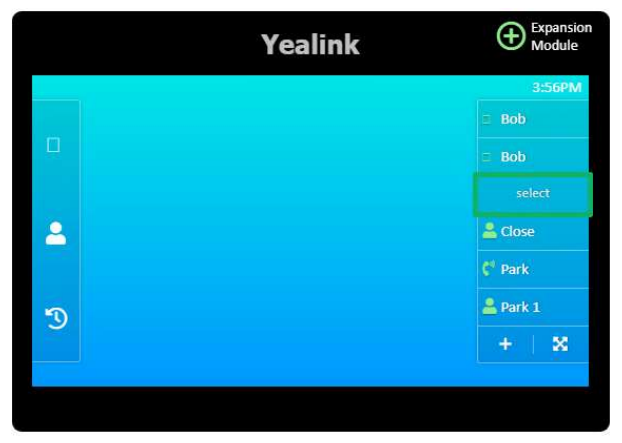
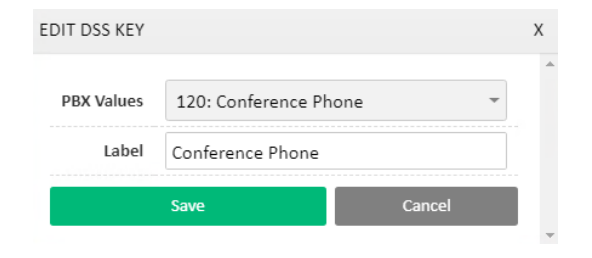
In the resulting popup, you can select which function you’d like the key to perform, along with
the target and a name for the key. For example, choosing another person’s extension will
configure a BLF and Speed dial key, which will show if they’re on the phone, and act as a
speed dial to them when pressed.
If you have an expansion module, click the + Expansion Module button to show and allow configuration of the additional keys provided. These are configured in the same way, by clicking their line key or corresponding screen section.

Available Key Types
Line Key: This is a special key type that configures one or more buttons to handle calls coming in to your extension.
PBX Extensions: Configures a key that monitors the state of another extension (eg. on the phone, ringing, available) while also allowing for quick transfers and speed dialling.
External Numbers: Sets up a speed dial key for a number found in Hosted PBX > External Numbers
Timeswitch Positions: Use a key to quickly switch between timeswitch favourites (eg. Lunch timeswitch override). For more information see Time Switch Setup guide
Call Parking: Configure a key to park a caller and additional keys to monitor individual parking lots, enabling parked caller retrieval. For more information see Call Parking Guide
Custom Values: This allows you to setup a custom key on your handset of either BLF (same functionality as PBX Extensions), Speed Dial (same functionality as external numbers), Line (additional line keys) or Call Park (same functionality as call parking) but manually specifying the target number or extension.
While most keys will synchronise automatically, you can force a resync by clicking the Save & Sync to Phone button.
Applying the Settings to Your Phone
Once the phone has received its initial configuration, any changes made from the web interface will automatically be delivered to the phone.
Before your phone will receive the initial configuration, it may need to be factory reset. For instructions in factory resetting your phone, please see Factory Reset Yealink Phones at the end of this guide
Updating the Assigned Extension or Address Book
Should you need to re-assign a handset to another extension, or to change which address book a phone receives, either click Actions in the top left of the Keys configuration and choose Edit Phone, or locate the phone in the list of Assigned Yealink Phones, then click Edit.
Resetting Your Phone
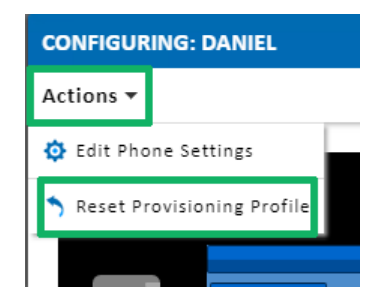
If a phone has previously been provisioned, but requires a factory reset, you’ll need to ‘release’ the provisioning profile before the phone will re-download its configuration. To do so, locate the handset under Configured PBX Extensions or Configured Yealink Phones and click Keys.

From the Actions menu, choose Reset Profile
Once complete, you can now factory reset your phone. For information on performing a factory reset, please see Factory Reset Yealink Phones at the end of this guide
Factory Reset Yealink Phones
Factory resetting Yealink phones can be done using the handset or base station.
Yealink T4 Series (T41, T42, T46, T48, etc.)
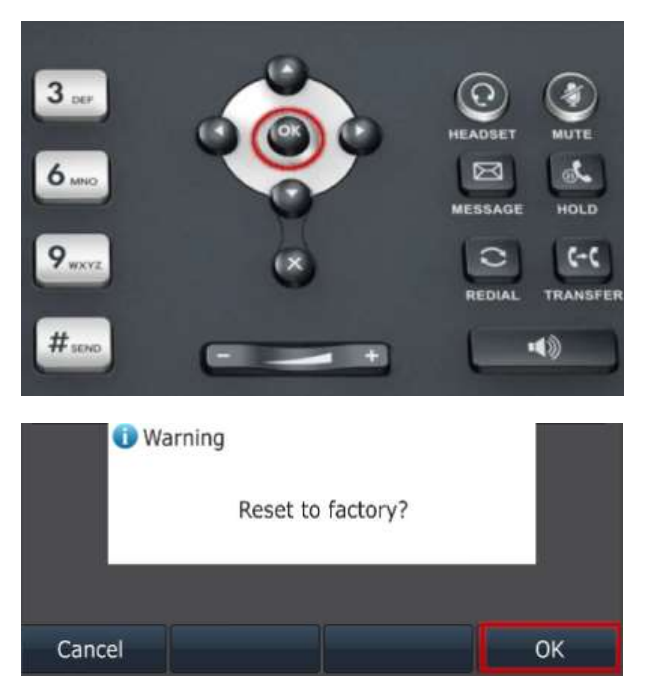
To reset your T4 series handset, ensure your phone is at idle (no calls in progress, or any notifications for voicemail, etc.)
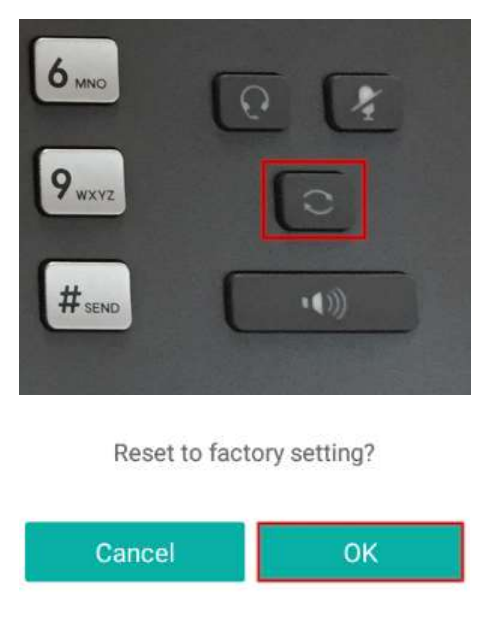
Press and hold the OK key for about 8 seconds, until you receive the ‘Reset to Factory’ prompt, then press OK to confirm the reset.
Yealink T5 Series (T53, T54, T56, T57, T58, etc.)
To reset your T5 series handset, ensure your phone is at idle (no calls in progress, or any notifications for voicemail, etc.)
If your handset has an OK key, press and hold this for about 8 seconds, until you receive the ‘Reset to Factory’ prompt, the press OK to confirm the reset.
If your handset does not have an OK key, press and hold the ‘Redial’ key for about 8 seconds, until you receive the ‘Reset to Factory’ prompt, and press the Accept key.
Yealink Cordless
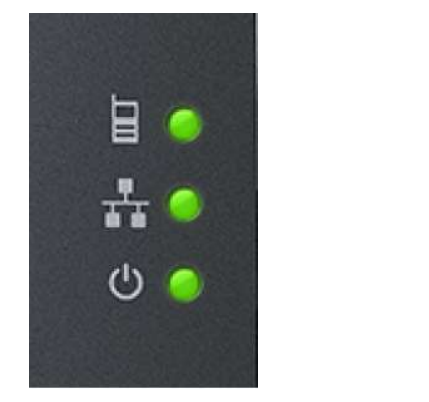
To reset your Yealink cordless, locate the base station, then remove the power. Hold the ‘Connect’ key and power back up, while continuing to hold Connect.

Once all 3 lights are illuminated, release the connect button. Your unit will now reset.
If your cordless handset loses its pairing with the base station, you can reconnect it by pressing the connect key until the ‘Registration’ indicator flashes, then press Reg on the handset.
Locating a Handset MAC Address
The MAC address of a handset acts as a unique identifier, and is required when adding handsets to the automatic provisioning system.
The MAC address can be found in the following locations:
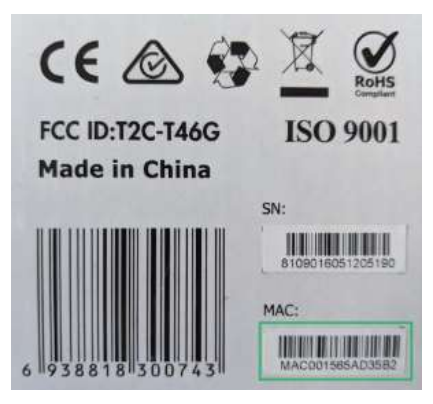
Handset Box
On the box your handset was shipped in, locate the label on the side. This will include the phone’s MAC address and a scannable barcode.
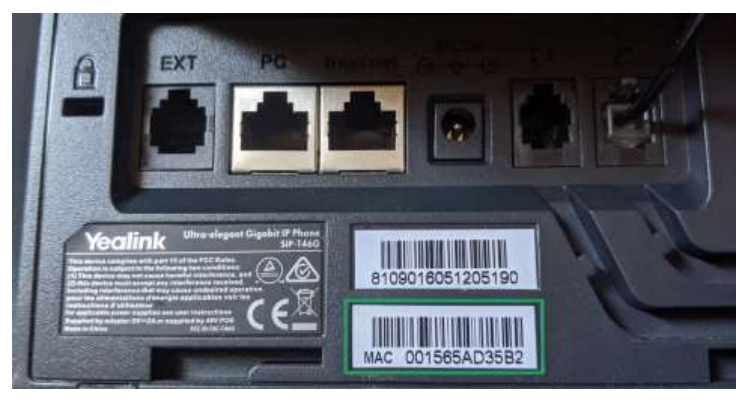
Handset Rear
You can locate the MAC address, along with the scannable barcode, on the rear of your device, normally near the bottom, as the image below shows.